[C#] radiobuttonでチェックされた項目を取得する方法
C#でRadioButtonのチェックされた項目を取得するには、通常はRadioButtonが含まれるグループを管理する方法が必要です。
Windows Formsアプリケーションでは、RadioButtonは通常、PanelやGroupBoxに配置されます。
各RadioButtonのCheckedプロパティを確認して、どのRadioButtonが選択されているかを判定します。
例えば、複数のRadioButtonがGroupBoxに含まれている場合、foreachループを使用して各RadioButtonのCheckedプロパティを確認し、trueであればそのRadioButtonが選択されていることがわかります。
選択されたRadioButtonのTextプロパティやNameプロパティを使用して、選択された項目の情報を取得できます。
チェックされたRadioButtonの取得方法
Checkedプロパティの利用
C#のWindowsフォームアプリケーションでは、RadioButtonの選択状態を取得するために、Checkedプロパティを利用することができます。
このプロパティは、RadioButtonが選択されている場合にtrueを返し、そうでない場合はfalseを返します。
以下は、RadioButtonのCheckedプロパティを使用して、選択された項目を取得するサンプルコードです。
partial class MyForm : Form
{
    public MyForm()
    {
        InitializeComponent();
    }
    private void GetSelectedRadioButton()
    {
        // RadioButtonの選択状態を確認
        if (radioButton1.Checked)
        {
            MessageBox.Show("ラジオボタン1が選択されています。");
        }
        else if (radioButton2.Checked)
        {
            MessageBox.Show("ラジオボタン2が選択されています。");
        }
        else if (radioButton3.Checked)
        {
            MessageBox.Show("ラジオボタン3が選択されています。");
        }
    }
}このコードでは、GetSelectedRadioButtonメソッド内で各RadioButtonのCheckedプロパティを確認し、選択されているRadioButtonに応じてメッセージボックスを表示します。
foreachループを使ったチェック
複数のRadioButtonがある場合、foreachループを使用して選択された項目を取得することができます。
これにより、コードが簡潔になり、メンテナンスが容易になります。
以下は、foreachループを使用して選択されたRadioButtonを取得するサンプルコードです。
partial class MyForm : Form
{
    public MyForm()
    {
        InitializeComponent();
    }
    private void GetSelectedRadioButton()
    {
        // RadioButtonの配列を作成
        RadioButton[] radioButtons = { radioButton1, radioButton2, radioButton3 };
        // foreachループで選択されたRadioButtonを確認
        foreach (RadioButton rb in radioButtons)
        {
            if (rb.Checked)
            {
                MessageBox.Show(rb.Text + "が選択されています。");
                break; // 選択されたらループを終了
            }
        }
    }
}このコードでは、RadioButtonの配列を作成し、foreachループを使って各RadioButtonのCheckedプロパティを確認しています。
選択されたRadioButtonのテキストをメッセージボックスで表示します。
LINQを使った簡潔な取得方法
LINQを使用すると、選択されたRadioButtonをより簡潔に取得することができます。
LINQのFirstOrDefaultメソッドを使うことで、選択されたRadioButtonを一行で取得できます。
以下は、LINQを使用して選択されたRadioButtonを取得するサンプルコードです。
partial class MyForm : Form
{
    public MyForm()
    {
        InitializeComponent();
    }
    private void GetSelectedRadioButton()
    {
        // LINQを使用して選択されたRadioButtonを取得
        var selectedRadioButton = new[] { radioButton1, radioButton2, radioButton3 }
            .FirstOrDefault(rb => rb.Checked);
        if (selectedRadioButton != null)
        {
            MessageBox.Show(selectedRadioButton.Text + "が選択されています。");
        }
    }
}
このコードでは、LINQを使用して配列内の最初の選択されたRadioButtonを取得し、そのテキストをメッセージボックスで表示します。
これにより、コードがよりシンプルで読みやすくなります。
実装例
基本的な実装例
基本的な実装では、1つのグループのRadioButtonから選択された項目を取得する方法を示します。
以下のサンプルコードでは、3つのRadioButtonを用意し、ボタンをクリックすることで選択された項目を表示します。
partial class MyForm : Form
{
    public MyForm()
    {
        InitializeComponent();
    }
    private void button1_Click(object sender, EventArgs e)
    {
        // 選択されたRadioButtonを取得
        if (radioButton1.Checked)
        {
            MessageBox.Show("ラジオボタン1が選択されています。");
        }
        else if (radioButton2.Checked)
        {
            MessageBox.Show("ラジオボタン2が選択されています。");
        }
        else if (radioButton3.Checked)
        {
            MessageBox.Show("ラジオボタン3が選択されています。");
        }
    }
}
このコードでは、ボタンがクリックされたときに、選択されたRadioButtonの状態を確認し、メッセージボックスで結果を表示します。
複数のRadioButtonグループを扱う例
複数のRadioButtonグループを扱う場合、各グループの選択状態を個別に管理する必要があります。
以下のサンプルコードでは、2つのグループのRadioButtonを用意し、それぞれの選択状態を取得します。
partial class MyForm : Form
{
    public MyForm()
    {
        InitializeComponent();
    }
    private void button1_Click(object sender, EventArgs e)
    {
        // グループ1の選択状態を確認
        string group1Selection = radioButton1.Checked ? "グループ1: ラジオボタン1" :
                             radioButton2.Checked ? "グループ1: ラジオボタン2" : "グループ1: なし";
        // グループ2の選択状態を確認
        string group2Selection = radioButton4.Checked ? "グループ2: ラジオボタン4" :
                             radioButton5.Checked ? "グループ2: ラジオボタン5" : "グループ2: なし";
        MessageBox.Show(group1Selection + "\n" + group2Selection);
    }
}
このコードでは、2つのグループのRadioButtonの選択状態を確認し、選択された項目をメッセージボックスで表示します。
イベントハンドラを使った動的な取得
イベントハンドラを使用することで、RadioButtonの選択が変更されたときに自動的に処理を行うことができます。
以下のサンプルコードでは、RadioButtonのCheckedChangedイベントを利用して、選択された項目をリアルタイムで表示します。
partial class MyForm : Form
{
    public MyForm()
    {
        InitializeComponent();

        // CheckedChangedイベントにハンドラを追加
        radioButton1.CheckedChanged += RadioButton_CheckedChanged;
        radioButton2.CheckedChanged += RadioButton_CheckedChanged;
        radioButton3.CheckedChanged += RadioButton_CheckedChanged;
    }
    private void RadioButton_CheckedChanged(object sender, EventArgs e)
    {
        // 選択されたRadioButtonを取得
        RadioButton selectedRadioButton = sender as RadioButton;
        if (selectedRadioButton != null && selectedRadioButton.Checked)
        {
            MessageBox.Show(selectedRadioButton.Text + "が選択されました。");
        }
    }
}このコードでは、各RadioButtonのCheckedChangedイベントにハンドラを追加し、選択されたRadioButtonのテキストをメッセージボックスで表示します。
これにより、ユーザーが選択を変更するたびに、選択された項目がリアルタイムで表示されます。
応用例
RadioButtonの選択に応じたUIの変更
RadioButtonの選択に応じて、UIの他の要素を動的に変更することができます。
例えば、特定のRadioButtonが選択されたときに、テキストボックスの内容を変更することができます。
以下のサンプルコードでは、選択されたRadioButtonに応じてラベルのテキストを変更します。
partial class MyForm : Form
{
    public MyForm()
    {
        InitializeComponent();

        // CheckedChangedイベントにハンドラを追加
        radioButton1.CheckedChanged += RadioButton_CheckedChanged;
        radioButton2.CheckedChanged += RadioButton_CheckedChanged;
    }
    private void RadioButton_CheckedChanged(object sender, EventArgs e)
    {
        // 選択されたRadioButtonを取得
        RadioButton selectedRadioButton = sender as RadioButton;
        if (selectedRadioButton != null && selectedRadioButton.Checked)
        {
            // ラベルのテキストを変更
            label1.Text = selectedRadioButton.Text + "が選択されました。";
        }
    }
}
このコードでは、RadioButtonの選択が変更されるたびに、ラベルのテキストが更新されます。
これにより、ユーザーは現在の選択状態を視覚的に確認できます。
データバインディングを使った選択状態の管理
データバインディングを使用することで、RadioButtonの選択状態を簡単に管理することができます。
以下のサンプルコードでは、データバインディングを利用して、選択された項目をプロパティにバインドします。
using System.ComponentModel;
using System.Windows.Forms;
using System;
using System.Drawing;

partial class MyForm : Form
{
	private ViewModel viewModel;
	private RadioButton radioButton1;
	private RadioButton radioButton2;
	public MyForm()
	{
		InitializeComponent();
		viewModel = new ViewModel();
		this.DataBindings.Add("Text", viewModel, "SelectedOption", true, DataSourceUpdateMode.OnPropertyChanged);

		radioButton1 = new RadioButton();
		radioButton1.Text = "Option1";
		radioButton1.Location = new Point(12, 50);
		radioButton1.AutoSize = true;
		this.Controls.Add(radioButton1);

		radioButton2 = new RadioButton();
		radioButton2.Text = "Option2";
		radioButton2.Location = new Point(12, 80);
		radioButton2.AutoSize = true;
		this.Controls.Add(radioButton2);

		// CheckedChangedイベントにハンドラを追加
		radioButton1.CheckedChanged += RadioButton_CheckedChanged;
		radioButton2.CheckedChanged += RadioButton_CheckedChanged;
	}
	private void RadioButton_CheckedChanged(object sender, EventArgs e)
	{
		// 選択されたRadioButtonを取得
		RadioButton selectedRadioButton = sender as RadioButton;
		if (selectedRadioButton != null && selectedRadioButton.Checked)
		{
			// ViewModelのプロパティを更新
			viewModel.SelectedOption = selectedRadioButton.Text;
		}
	}
}

public class ViewModel : INotifyPropertyChanged
{
	private string selectedOption;
	public string SelectedOption
	{
		get { return selectedOption; }
		set
		{
			selectedOption = value;
			OnPropertyChanged(nameof(SelectedOption));
		}
	}
	public event PropertyChangedEventHandler PropertyChanged;
	protected void OnPropertyChanged(string propertyName)
	{
		PropertyChanged?.Invoke(this, new PropertyChangedEventArgs(propertyName));
	}
}このコードでは、ViewModelクラスを作成し、SelectedOptionプロパティをフォームのタイトルにバインドしています。
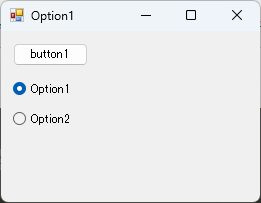
RadioButtonの選択が変更されると、ViewModelのプロパティが更新され、UIに反映されます。
選択されたRadioButtonに基づくデータ処理
選択されたRadioButtonに基づいて、特定のデータ処理を行うことも可能です。
以下のサンプルコードでは、選択されたRadioButtonに応じて異なる計算を行い、その結果を表示します。
partial class MyForm : Form
{
    public MyForm()
    {
        InitializeComponent();
    }
    private void button1_Click(object sender, EventArgs e)
    {
        double result = 0;
        // 選択されたRadioButtonに基づく計算
        if (radioButton1.Checked)
        {
            result = 10 + 5; // 加算
        }
        else if (radioButton2.Checked)
        {
            result = 10 - 5; // 減算
        }
        else if (radioButton3.Checked)
        {
            result = 10 * 5; // 乗算
        }
        MessageBox.Show("計算結果: " + result);
    }
}
このコードでは、ボタンがクリックされたときに、選択されたRadioButtonに基づいて異なる計算を行い、その結果をメッセージボックスで表示します。
これにより、ユーザーの選択に応じた動的なデータ処理が可能になります。
まとめ
この記事では、C#のWindowsフォームにおけるRadioButtonの選択状態の取得方法や、実装例、応用例について詳しく解説しました。
基本的な使い方から、複数のグループを扱う方法、さらには選択に応じたUIの変更やデータ処理の実装まで、幅広くカバーしています。
これを機に、RadioButtonを活用したインタラクティブなアプリケーションを作成してみてはいかがでしょうか。
![[C#] RadioButtonの初期化方法と注意点](https://af-e.net/wp-content/uploads/2024/09/thumbnail-37283.png)
![[C#] RadioButtonのチェック状態を変更する方法](https://af-e.net/wp-content/uploads/2024/09/thumbnail-37281.png)
![[C#] RadioButtonの使い方と実装方法](https://af-e.net/wp-content/uploads/2024/09/thumbnail-37282.png)
![[C#] RadioButtonのクリックイベントの実装方法](https://af-e.net/wp-content/uploads/2024/09/thumbnail-37276.png)
![[C#] RadioButtonのグループ化方法と実践的な活用法](https://af-e.net/wp-content/uploads/2024/09/thumbnail-37277.png)
![[C#] RadioButtonのチェック解除方法](https://af-e.net/wp-content/uploads/2024/09/thumbnail-37278.png)
![[C#] RadioButtonのチェック状態を取得・設定する方法](https://af-e.net/wp-content/uploads/2024/09/thumbnail-37279.png)
![[C#] RadioButtonのチェック状態を取得する方法](https://af-e.net/wp-content/uploads/2024/09/thumbnail-37280.png)